
Additional information
| Colour | Gloss Black, Textured Black, Satin Black, White, Silver, Clear, Carbon Effect |
|---|





Price range: £130.00 through £135.00
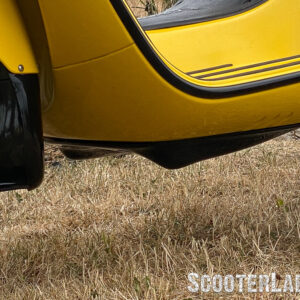
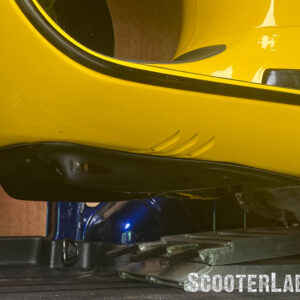
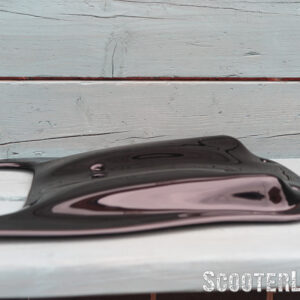
GTS owners will know that the climate in the UK and other parts of Europe isn’t good for the Vespa’s delicate paintwork, they quite quickly rust. So, we’ve developed this under tray to help protect your floor pan from stone chips/salt/water ingress and ultimately… rust!
Hand made in England
This part was designed and developed by us in the UK, it’s also hand formed and finished by us and that process and the materials involved in the tooling process don’t come cheap I’m afraid but neither does your near £6,000 GTS!
The SLUK Chassis Guard is primarily designed to be used without a side stand (although you can retain your stand if you prefer). If you’re using without the stand you’ll get a much sleeker custom look and leave less chance for water/grit etc to get inside.
This product will fit all Vespa GTS 125/250/300 models, although fitting will vary slightly on the earlier models due to a change in the design of the chassis (full details are in the video and text below).
**Due to a difference in the chassis, we aren’t currently recommending this for the latest 310 model**
Sidestand removal
If you’re removing your sidestand on a pre-HPE model then you simply unbolt it and chuck it in a corner of the garage, job done.
On the HPE model you will also have to unbolt the microswitch for the side stand as well. Then unclip the cable and feed it inside your frame where the battery sits, once inside you need to reconnect the switch and store that inside the frame (we suggest wrapping it in some bubble wrap or similar and taping it to the chassis so it doesn’t move around. If you don’t reconnect the switch the scooter won’t start.
Leaving the side stand on?
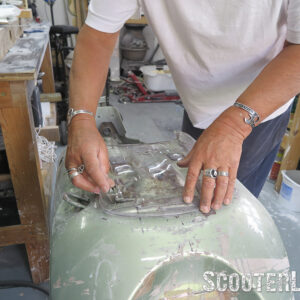
If you want to leave the side stand on you need to cut out some material on the Chassis Guard for the stand to fit into and operate. We’ve left a trim line on the inside of the product so simply drill a few decent-sized holes and use a jigsaw to trim it out. You can easily ‘dress’ the cut using a Dremel or hand file afterwards.
Fitting kit
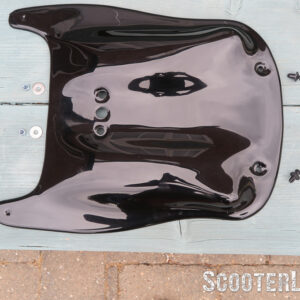
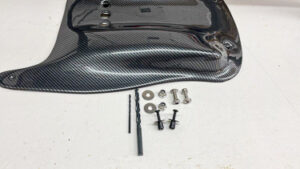
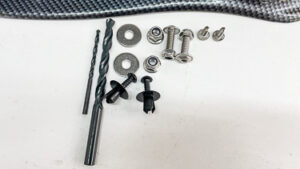
The product comes complete with everything you need to fit it, including 2 quality metal drill bits, stainless self tapping screws, bolts, nylock nuts and washers. Plus two plastic blind rivets.
Prior to fitting
We recommend cleaning the frame before you fit the product and use some anti-corrosion spray. You can also spray inside the battery compartment at the same time, any extra rust protection is worth doing on a GTS.
Fitting
Method 1 HPE model: If you have an HPE model the regulator has been repositioned into the battery compartment and is bolted down using 2 bolts that protrude through the frame underneath the scooter. We supply 2 slightly longer stainless steel bolts with nylock nuts for you to replace them with. These longer bolts are then used as the main fixing point for the Chassis Guard. In addition, we also supply two automotive ‘blind’ plastic rivets.
Optional extras
You can also fit 2 self-tapping screws (supplied) at the rear end of the Guard by drilling a couple of small holes through the product and into the frame with the supplied drill bit. We’ve left two dimples on the Guard to drill through.
If you want to go for the full monty you can also run a bead of clear silicone around the inside lip of the Chassis Guard before fitting, this will provide a completely waterproof seal. After using silicone we suggest you tape the Chassis Guard in place, wipe away any excess silicone using an alcohol wipe or similar and leave the scooter overnight for the silicone to go off.
Method 2 – earlier GTS 125/250/300
The earlier non-HPE models don’t have the two regulator bolt holes, so to fit using the bolt method you will have to drill those 2 holes from underneath your frame, we supply a quality drill bit and the bolts. To do this it’ll be easier if you have a helper to lean the scooter over whilst you drill.
If you’re unwilling to drill the frame we strongly suggest you drill 2 smaller ‘self-tapper’ holes at the back of the frame instead, the product has two dimples to show where to drill.
For safety, the Chassis Guard needs to have some mechanical fastening to the frame!
We also suggest you silicone it on as well.
There are a couple of pre-drilled drain holes in the Chassis Guard to stop any water/moisture sitting inside it and there is a gap from product to frame.
Removal
It should only take a couple of minutes to remove the product if you want to have a look inside at any time, or if you’re selling/buying a used GTS with one fitted and you want to be 100% sure the floor pan is still in good condition and the seller isn’t trying to hide any rot. We also supply this in a clear option so you can keep an eye on things. The clear version isn’t 100% optically clear but is pretty invisible to the eye.
| Colour | Gloss Black, Textured Black, Satin Black, White, Silver, Clear, Carbon Effect |
|---|



© 2026 SLUK - Shop.

Reviews
There are no reviews yet.